Cats are maybe not considered a man’s best friend, but they surely are seen as the prettiest pet! Cat lovers are sometimes even perceived as over-eager, posting photos and pictures of their cats all over the internet. Honestly, who hasn’t been caught watching hundreds of cute or funny can pics online!
Descriptions of cats range from lovely, cute, fuzzy and adorable, to egotistic or aloof. Be as it may, cats are beautiful, and while some people like to take photos of them, the more artistic ones enjoy drawing them.
It you are one of the aspiring artists, here is how to draw a cat.
Before you start

Drawing a cat is not too complicated, but it’s not an easy job either. Before you start, make sure you study those cat photographs through and through. They will give you better insight in what kind of a cat you want to draw and, more importantly, you will learn a lot about cat anatomy.
When you are done with your visual study, feel free to grab a pencil and paper and start to draw a cat.
Step 1

When you start, outline basic shapes of the cat body. We are drawing a sitting cat, so the base for this drawing would be a circle for the head, another larger circle attached to it for the body and a half-moon shape for the bottom. Add crossed lines in the head circle that will help you sketch the rest of the face later.
Attention – do not press too hard! These lines should be fine, as they will be erased when the main drawing is finished.
Step 2
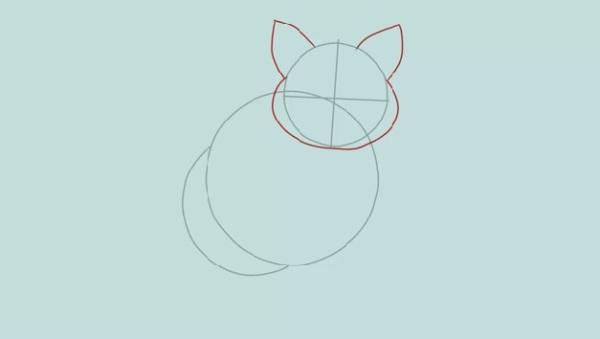
Outline the cat face. Drawing your sketch, bear in mind that the face of a cat is slightly oval and wide, cheeks are usually full. Ears of most of the cats are triangular in shape, but slightly curved to the outside. Make them seem natural.
Step 3
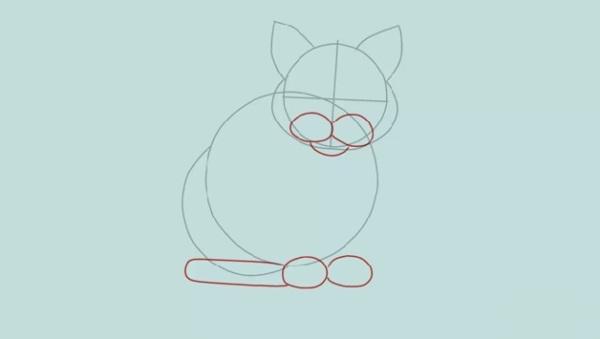
Sketch two egg-shaped elements on the bottom part of the cat face. Make them soft looking and connect them below with a curved line. These three areas are the base for construction the nose and the mouth of the cat.
Similar egg-shaped circles add to the base of your drawing, for paws. Extend this pair with a rounded rectangle on the side, reaching the back of the cat body.
Step 4
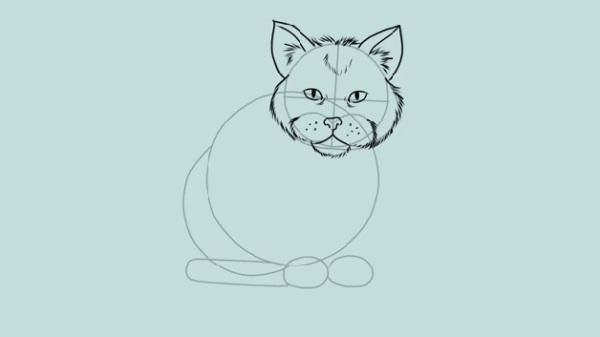
Now is the time to finish the face! Draw two almond-shaped eyes where the horizontal guideline in the face is. Extend them a little bit towards the middle and darken the edges. Draw the puffy “T” shaped nose and freckles on the side. Finish off the ears with a rounded dividing line, giving them three-dimensional look. When you frame the cat head, use series of very short, fine strokes, not long lines, to emulate the furr. Furr is usually drawn around the cheeks, nose, around the chin, inside the ears and on top of the head.
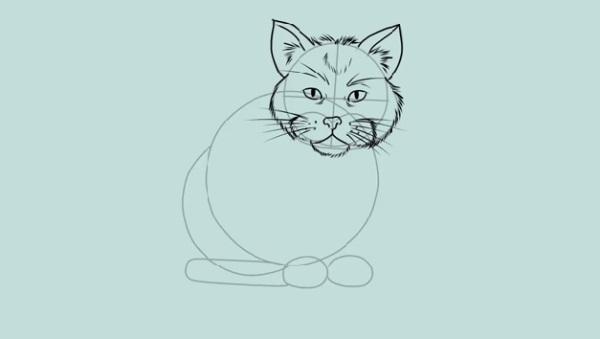
Allow your hand to do longer line strokes when you draw the cat whiskers. Add the same whisker shape to the eyebrows. Do not overdo the amount of whiskers. Think – real cat!
Step 6

Outline the paws and the tail, wrapped around the body (from the rectangle). To make the paws appear realistic, take time to draw nails. Frame everything with the same series of short strokes as you used with the head, outlining the front legs with these furry strokes only.
Step 7
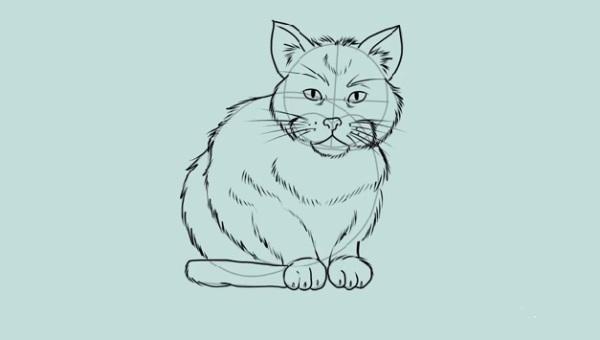
Prepare to make your kitty very fuzzy! Outline the whole body with the furry short strokes, dividing it in two sections. Take time to emphasize the chest and any crevasses a real cat would have when sitting.
Step 8
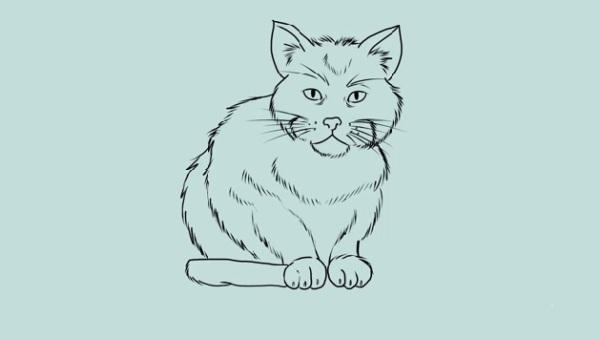
You can finally erase the initial guidelines and – there it is, your cat drawing!
Step 9
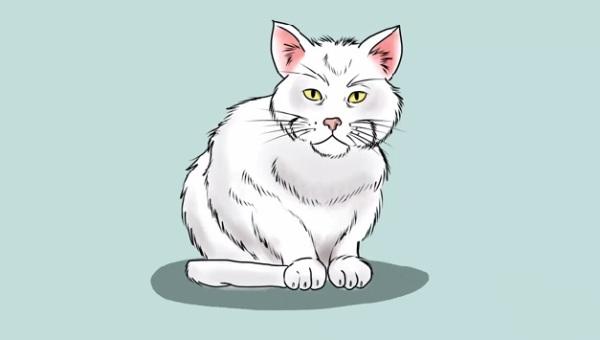
You can take time to color and shade your cat drawing, making a white, black or calico kitten.
This is, just like the type of a cat you wish to draw, up to you.
And remember – practice makes perfect!


