Modern times are usually connected with innovation and new solutions in design and technology. We are always on the lookout for new ideas, new moments, thinking progressively. But progressive thinking is not all about the new! We also live in the era of recycling and more recently – upcycling – a phenomenon dedicated to the redefinition of old objects such as DIY wine bottles, meant to give them new life and even purpose!
In the sphere of home design, upcycling is playing a big role. From huge and bulky restored furniture pieces, to decoration – and it is precisely home decoration we are talking about here!
Every home is suffering because of excess debris made out of quality packaging. For those unwilling or unable to recycle the regular way, these refutes can become valuable material for different decorative items. Once, glass was considered precious, and now – we are swimming in the sea of discarded glass wine bottles, not knowing what to do with them.
Well – the solution exists and a spectacular one! Wine bottles can be redesigned and reinvented through various DIY processes – turning them into new pieces of unique home furnishings. Wine bottles can be turned into flower vases, flower pots or beds, hanging lamps and a number of amazing decorations that give a home that special something.
Below, we give you over 30 creative ideas on how to transform an ordinary glass bottle into a DIY masterpiece! All of the solutions are simple to make, but they are satisfyingly challenging for the imagination, and finally aesthetically pleasing.
You might need some special tools for some of the ideas below, such as the glass cutter, flame glass cutter, glass drill, glue, glass dye and heaps of ribbons, rope, and other decorative trinkets! Make a day out of the DIY wine bottle play and enjoy creating!
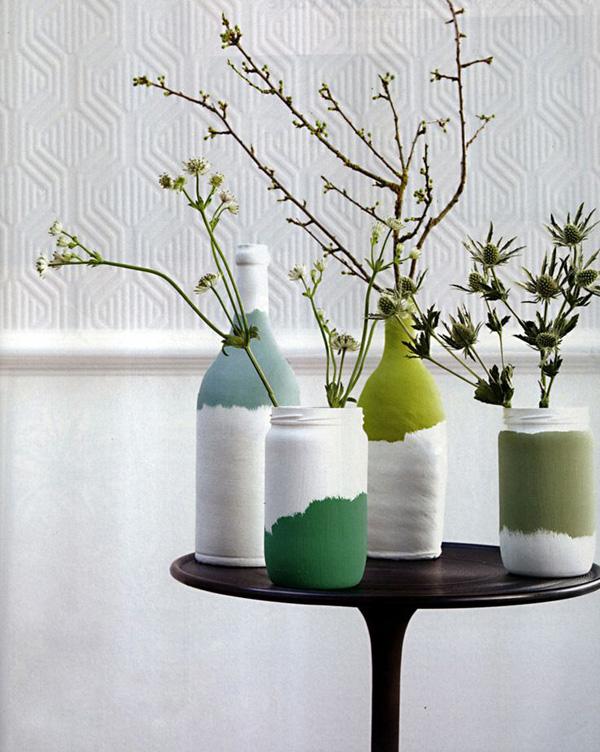
Spring always reminds of gentle, pastel tones! Paint your bottle entirely in a pastel color of choice, and add a white coat freehand on its top and its bottom. You will get fantastic vases, perfect for the blossoming flowers, or even branches picked along the way.
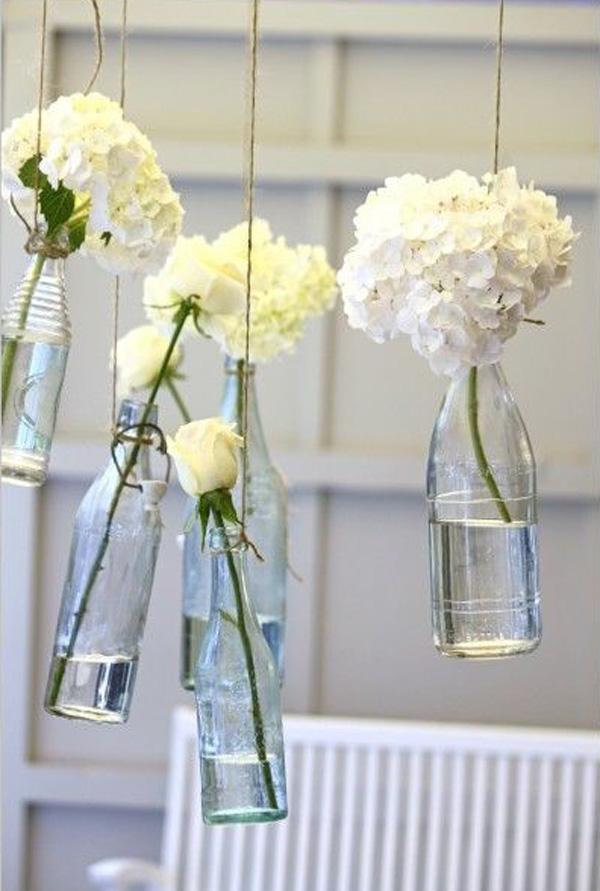
A simple way to make a hanging vase! Clean out empty transparent bottles, tie their necks with thin rope and find a place to hang them! They will look beautiful in a group, with white, pink, red or various flowers in each.
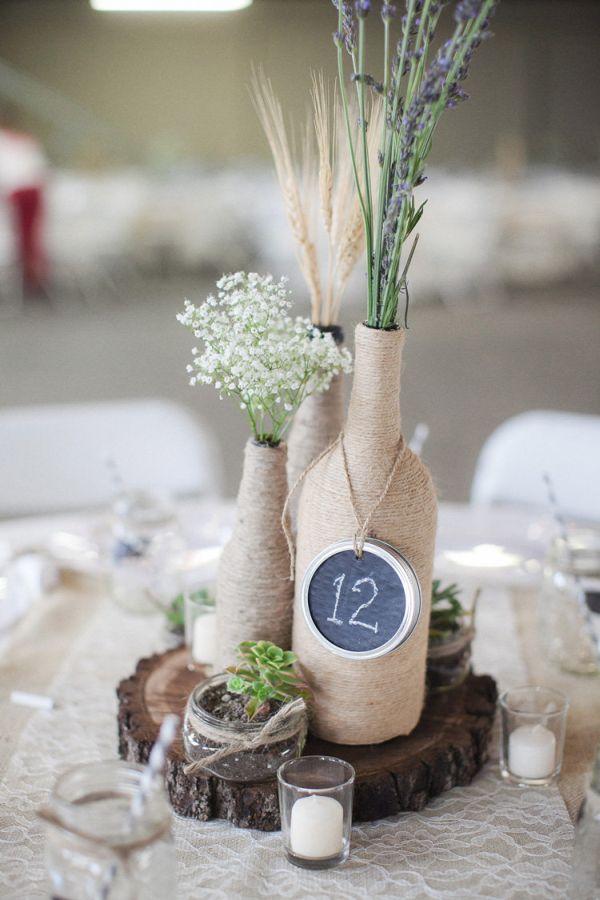
A wine bottle got roped! You will need glue and thin rope for the best effect. Spread the glue over the bottle, and then coat it in rope previously drenched in the same glue, wrapping the thread tightly around the glass body. Wait till it dries well. You will get an original vase or a container, which will give your interior a special, natural look.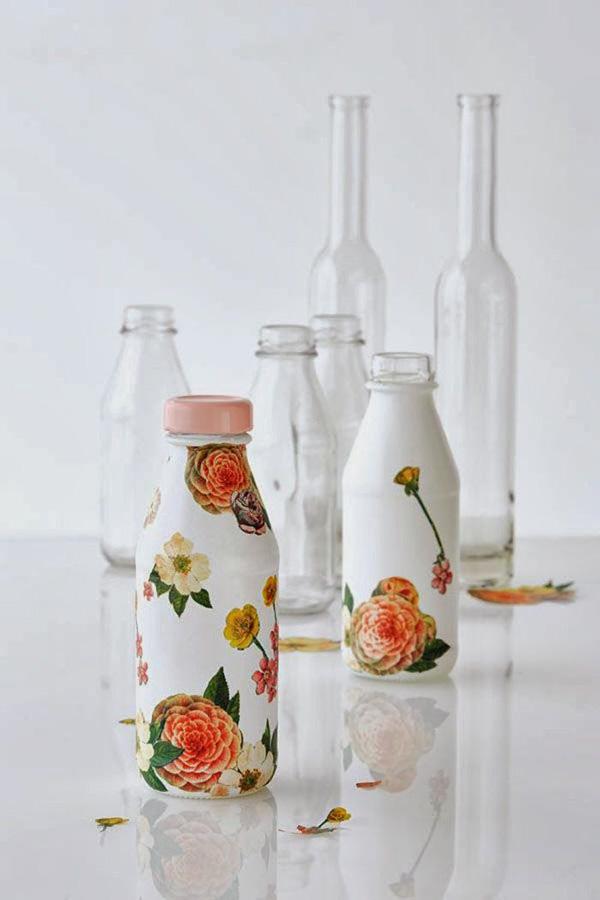
Decoupage! You can paint your wine or any glass bottle in opaque white. When the paint is completely dry, you can select beautiful motifs and decoupage them onto the bottles. You can get a wonderful floral container or vase, or decorated with any other picture you might like.
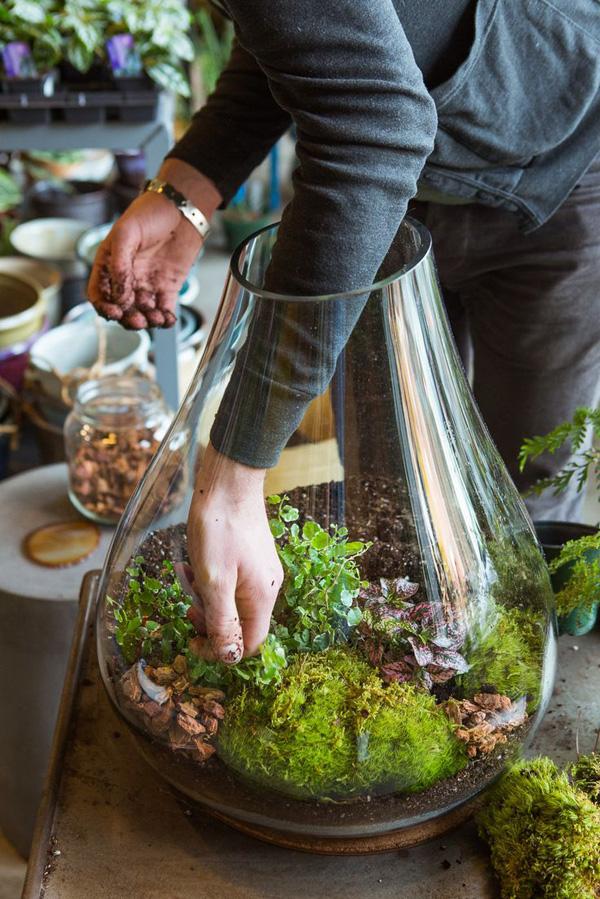
Use bottle as a flower pot! Or even a flower bed. The fact is, this can only be done with a big glass container, while a bottle is a bit too thin. Or you can cut it up in half, and make glass-like small, transparent flower pots, bringing raw nature into your home.
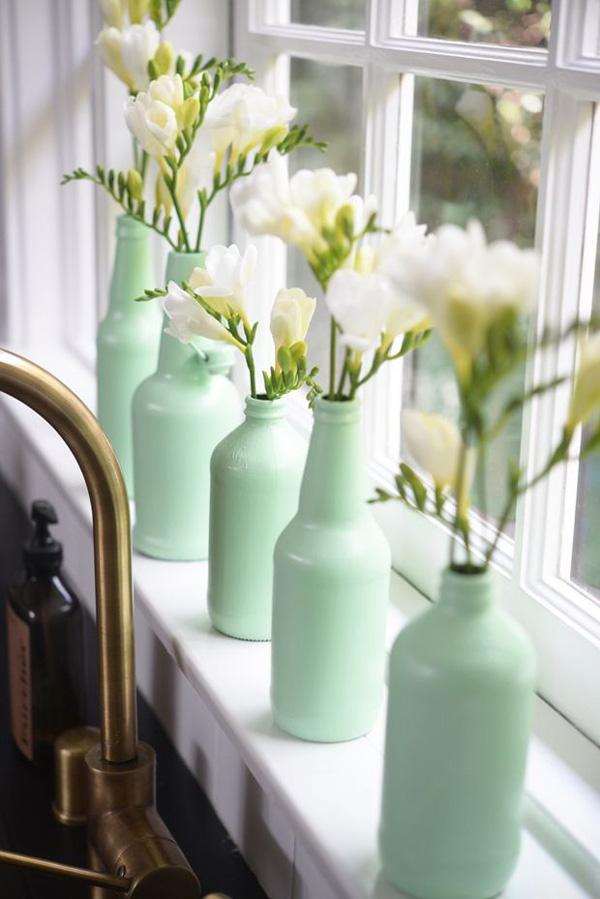
Take glasses of different sizes and paint them in a light-green pastel color, or any other nuance of your choice. Place the same kind of flowers in each, achieving a wonderful effect.
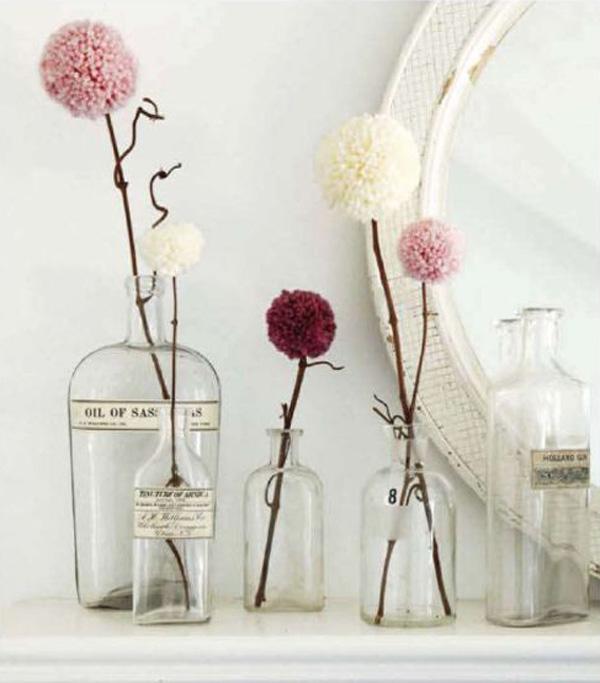
Go vintage! Vintage bottles are beautiful just as they are. Scavage the flee market for antique glass and use them as decoration or vase without making any changes.
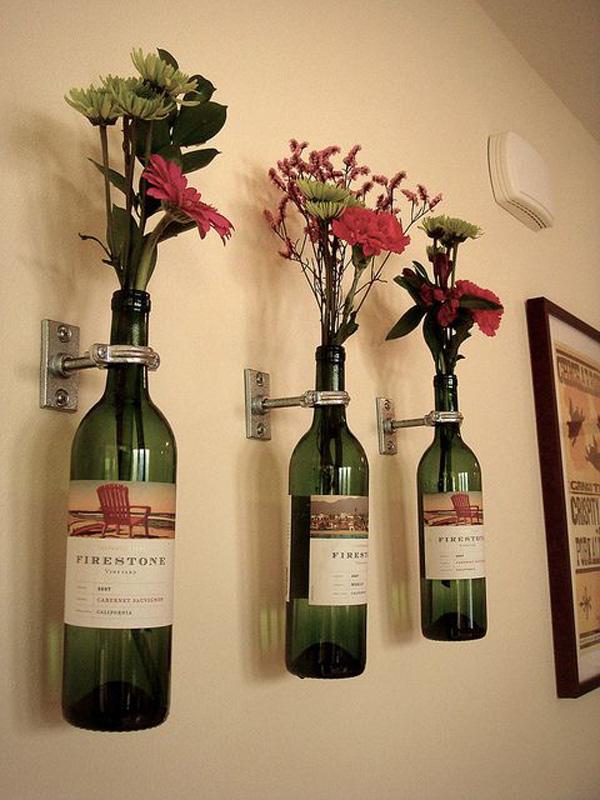
Remember the good year! Wine is noble, and so are its bottles. You can always remember that special moment by preserving a bottle and attaching it to a wall carrier. It can be a vase, a candle-holder, or just a memento.
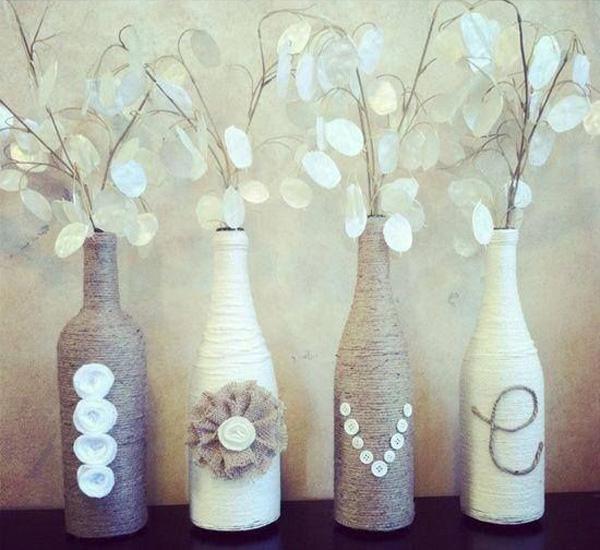
Roped and light! Bottles in this example are roped, same as in picture 3. But, other details are added – buttons, fabric flowers etc. Stick to a simple palette and place light, dried flowers in a row of prepared deco-bottles.
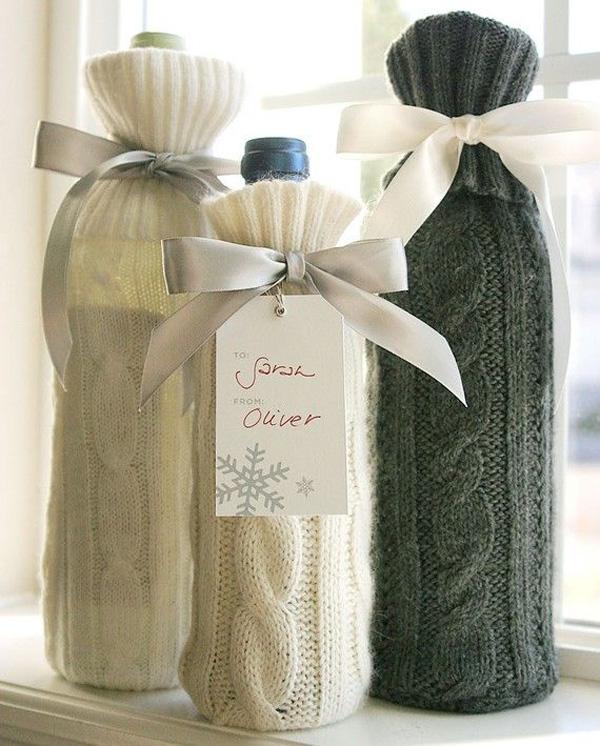
Winter style vase. Knit small jumpers for your vases to keep your flowers nice and warm for a special wintertime look. Finish them off with satin ribbons.
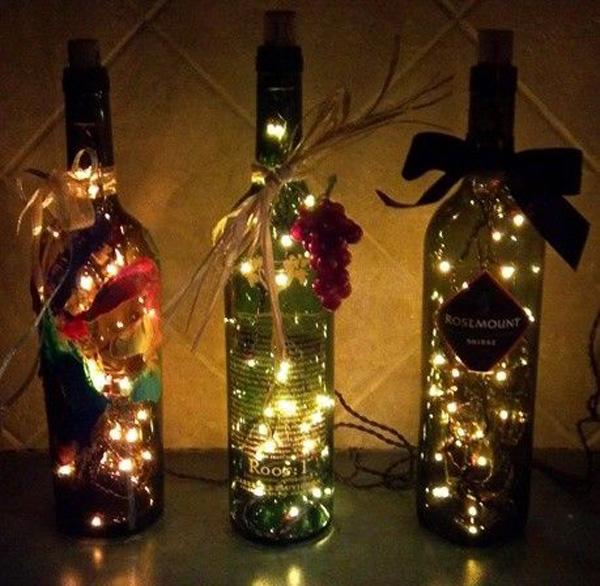
DIY Christmas lights in wine bottles! You can put your Christmas lights in a row of well-designed bottles. Tie ribbons around the bottles’ necks for a more festive feel.
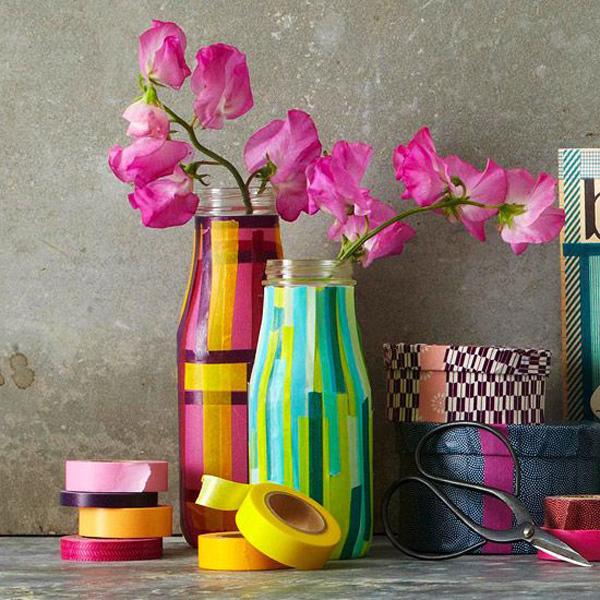
Tape the bottle! Various tapes in various colors can serve as a coloring for your bottle vases. Coordinate colors between themselves, be aware of the contrasts, and then – use the flowers of adequate nuance for a more lively effect.
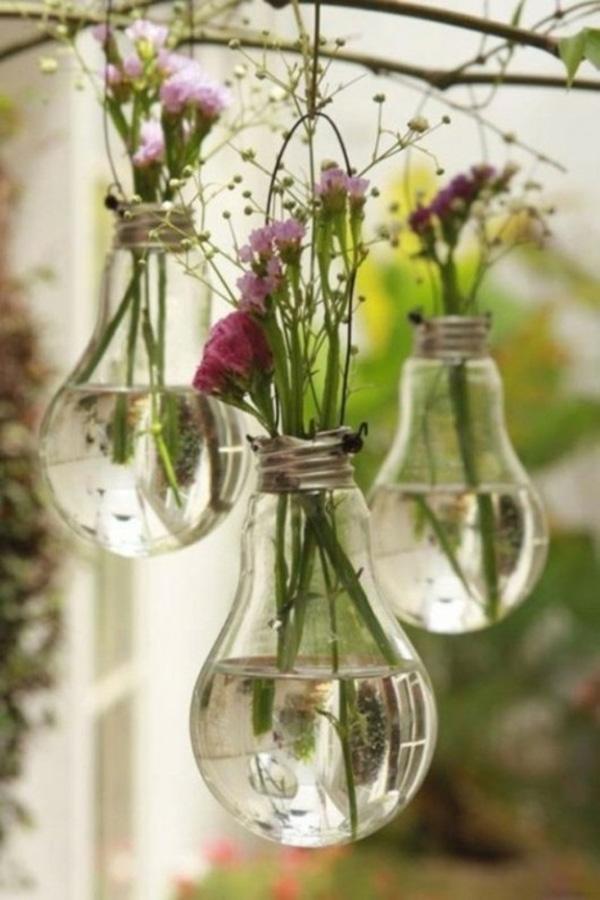
Light-bulb mini-vase! Who says old light bulbs are not eco-friendly! Take the wire out and hang them up, filled with a bit of water and small flowers – violets or snowdrops. Your garden will light up and your guests will love it!
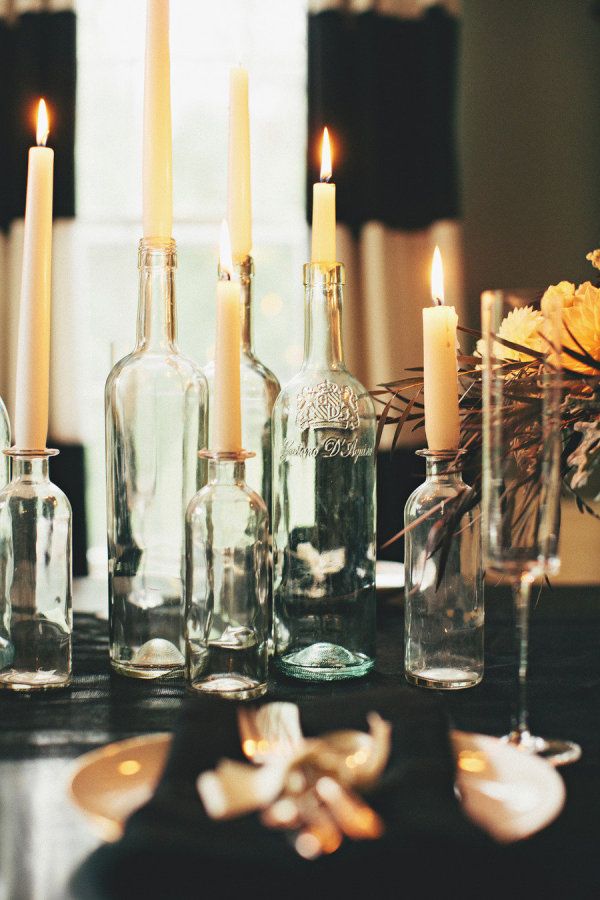
Love the candlelight! DIY wine bottles of different sizes, transparent and cleared of any paper and labels. The ideas can be used in a group as candle holders. The effect is luscious and the light glistens wonderfully against the glass.
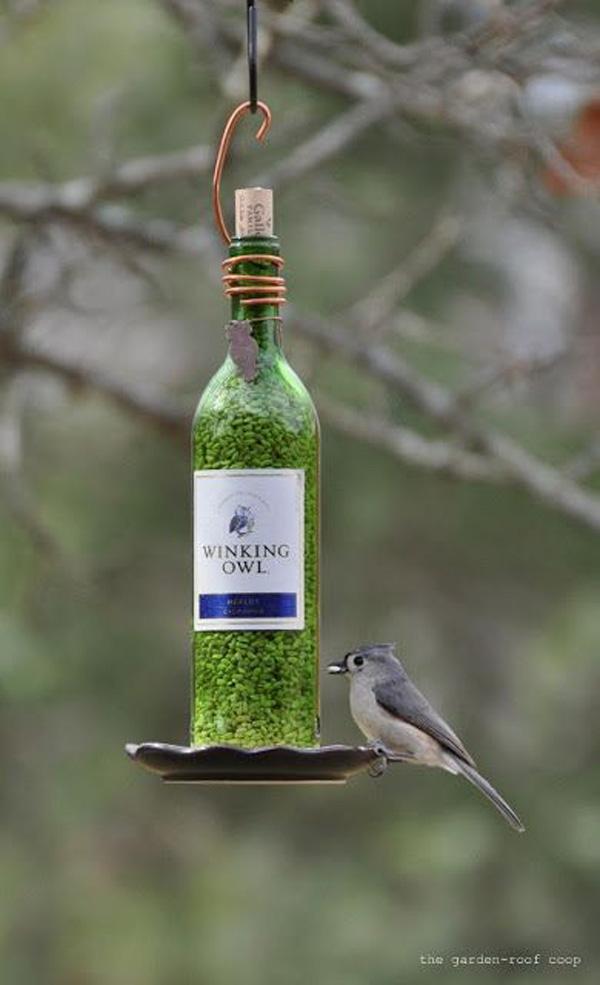
Bottle bird-feeder! Drill a small hole at the side of the bottle carefully, and glue a saucer to its bottom. Fill it with birdseed and cork it up. Then hang it out in the garden for the little birds to enjoy – but you will love this as well!
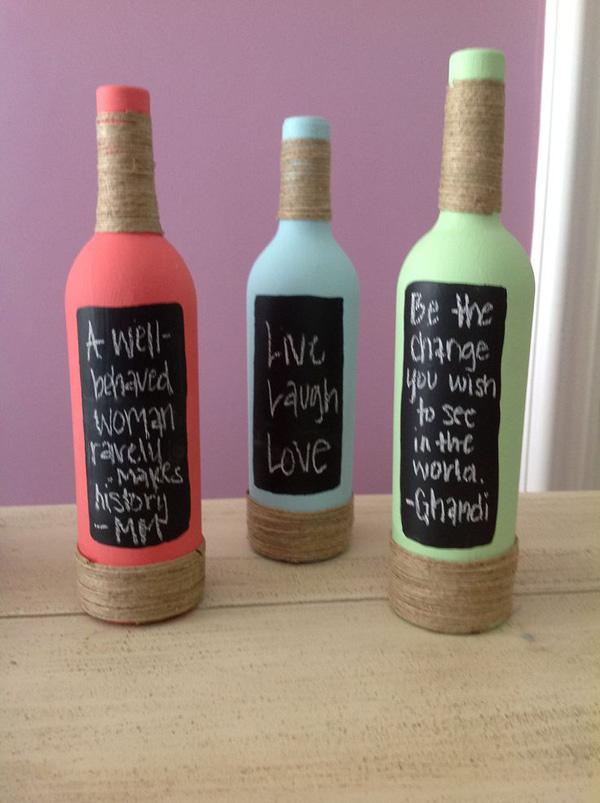
Make your bottle-message something else entirely! You can paint bottles in various shades of pastel nuances, decorate with raffia and paint a rectangular section in opaque black. This part can be the small blackboard for messages – if your DIY bottle is a gift or just for a more personalized touch.
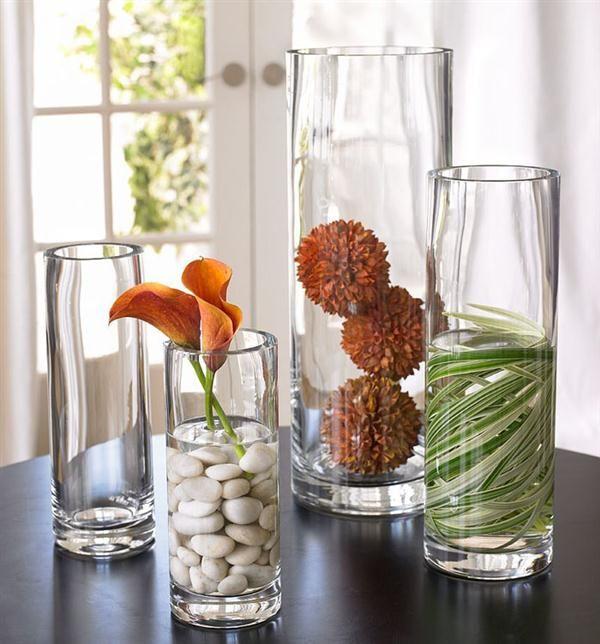
Simple, beautifully shaped glasses are decorative enough. Grouped together, they can hold various stones, plants or flowers submerged in water and form a zen corner of sorts.
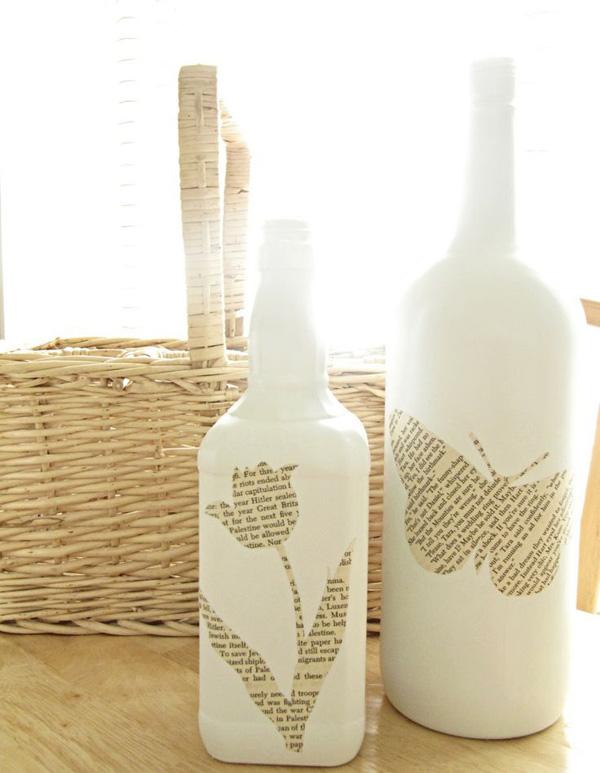
Another decoupage moment! Wine and glass bottles painted in opaque white are blank canvas for charming shapes cut out of newspapers.
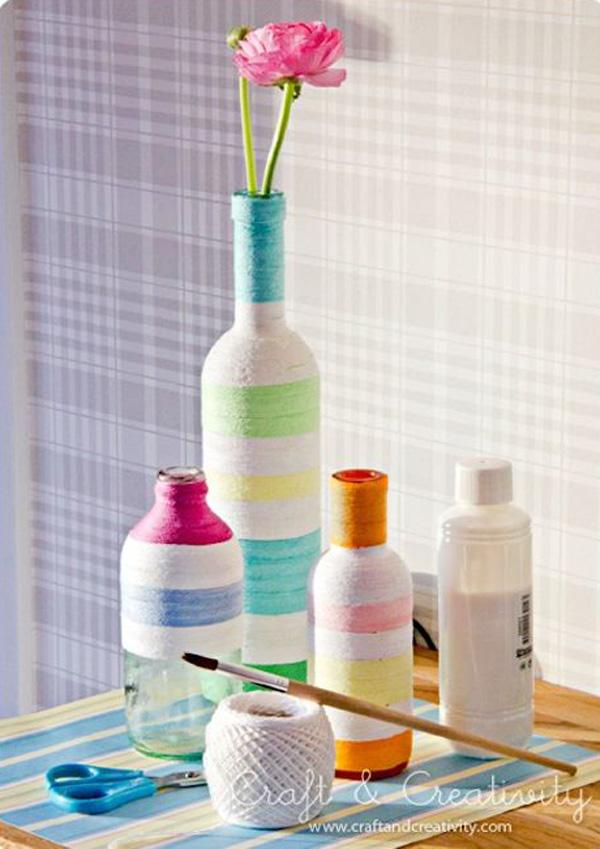
Roped and colorful! Wrap your bottles in thin white rope, and then color it, making it a striped delight! Choose lively colors and bright up your space.
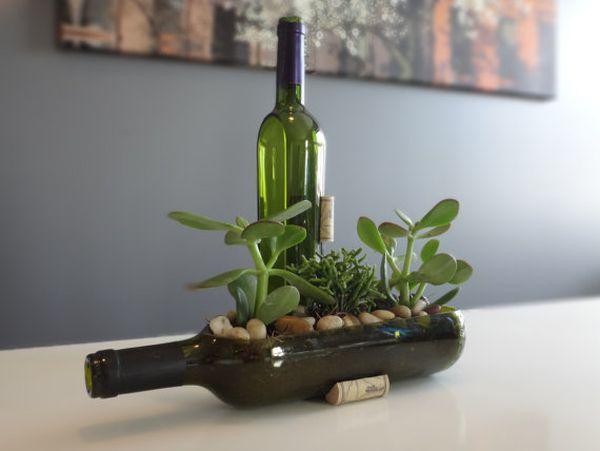
An old, but precious wine bottle can be cut on the side, laid down, becoming a flower bed. It’s personalized, original and natural all at once.
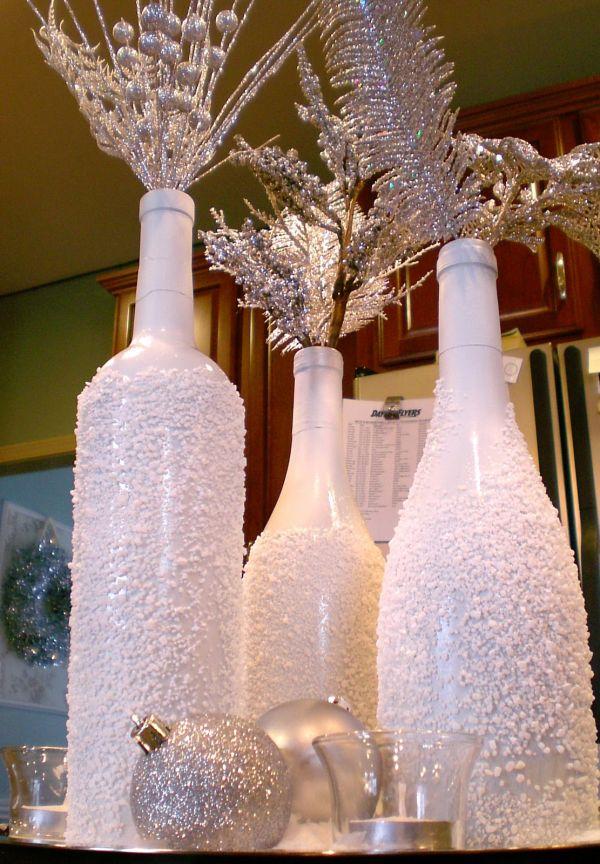
Shimmery snow bottles. White painted bottles can be coated in glue and then dipped in white beads or styrofoam. Place silver, shimmering decorations inside, and you get a perfect white Christmas DIY setting.
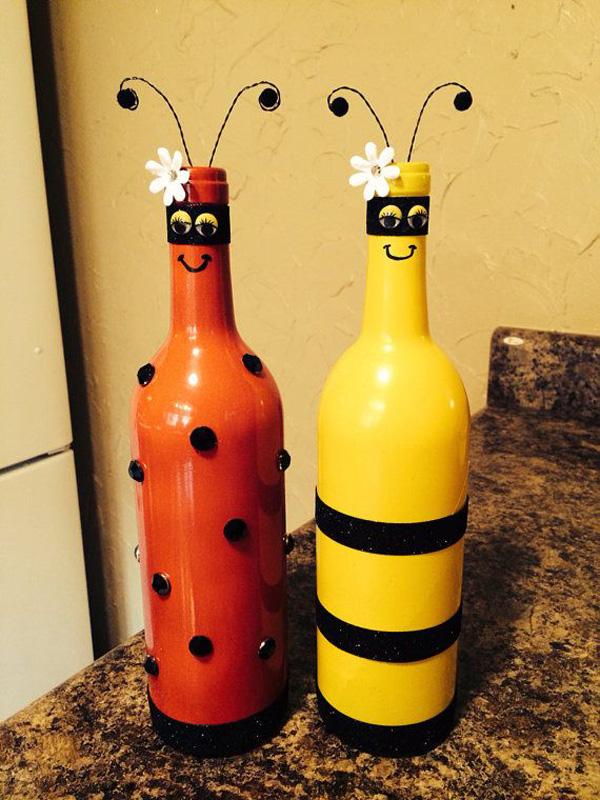
Child’s play! Teach your kids some creativity by turning old bottles into ladybugs and bees, by painting them and then gluing fabric and wire pieces on the right spots.
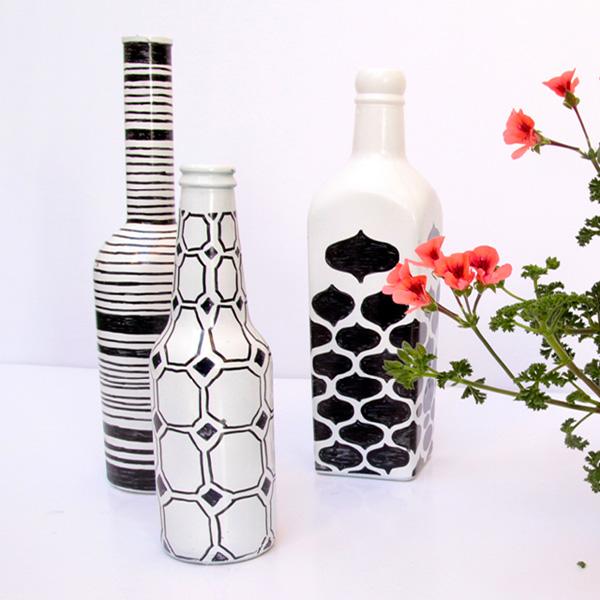
Go chic! White painted bottles of various shapes can be decorated with simple black ornaments, making them a fabulous and stylish geometric decoration.
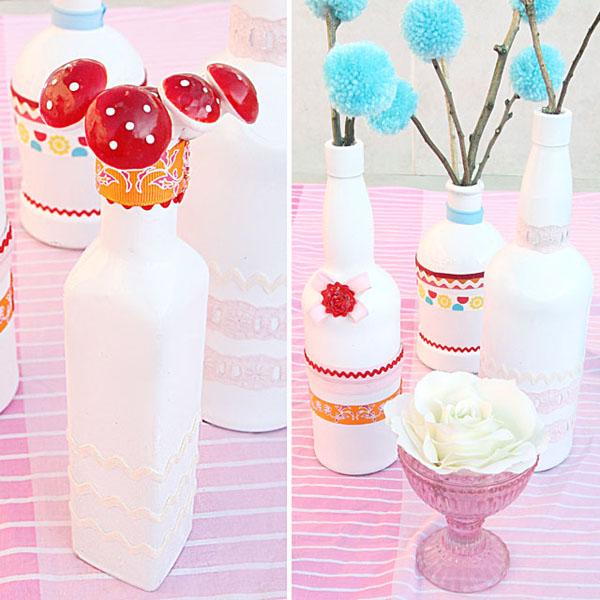
Ribbon heaven! Just play with various ribbons and small trinkets, adding them on various places. Keep the palette simple and you’ll get a fantastic result!
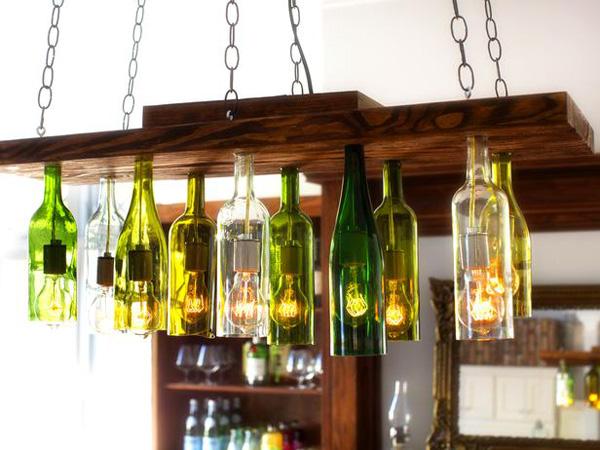
A bottle chandelier – cut off the lower parts of a group of bottles and use them as chandeliers. If you make an extra effort and drill holes for bottlenecks in an antiqued wooden board – you’ll get a very special, very original solution for a light fixture.
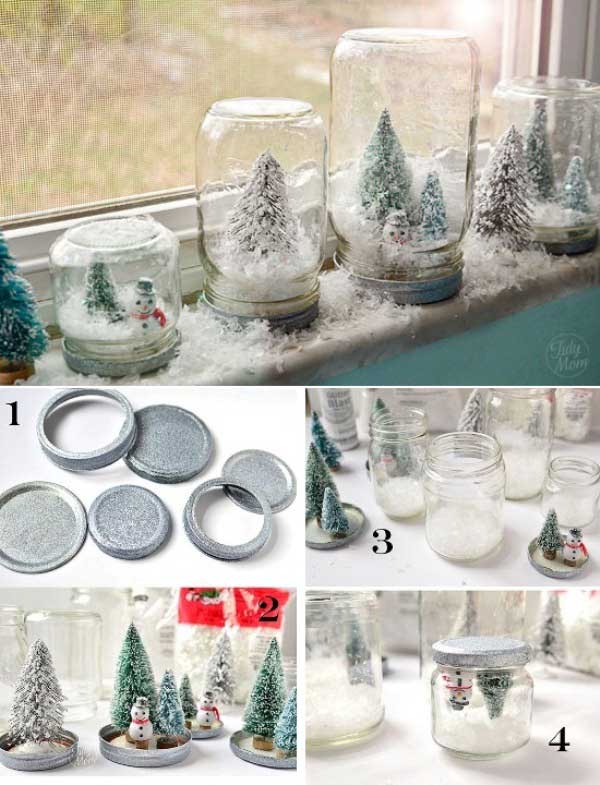
DIY Snow globe! Or a snow-jar, better said. In an array of upside-down jars, make miniature snowy settings and place along a window board or a mantlepiece. Do not fill with fluid – unless certain you can seal the jar tightly.
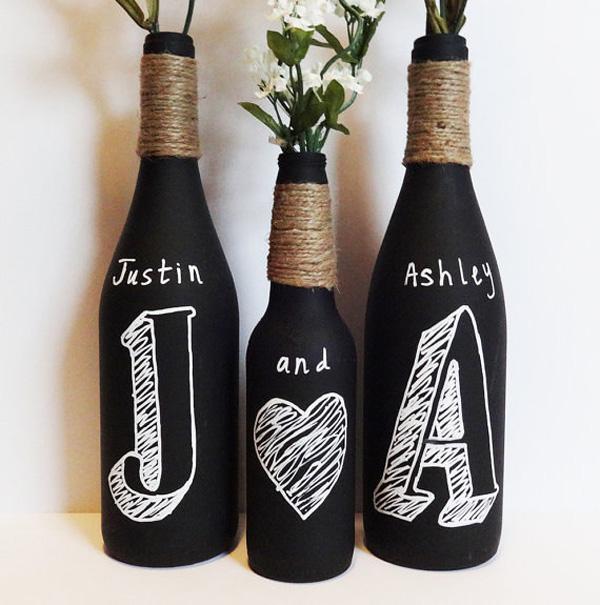
Combining two techniques – a blackboard and rope decoration, your bottles can become original vessel for messages and signs in your home.
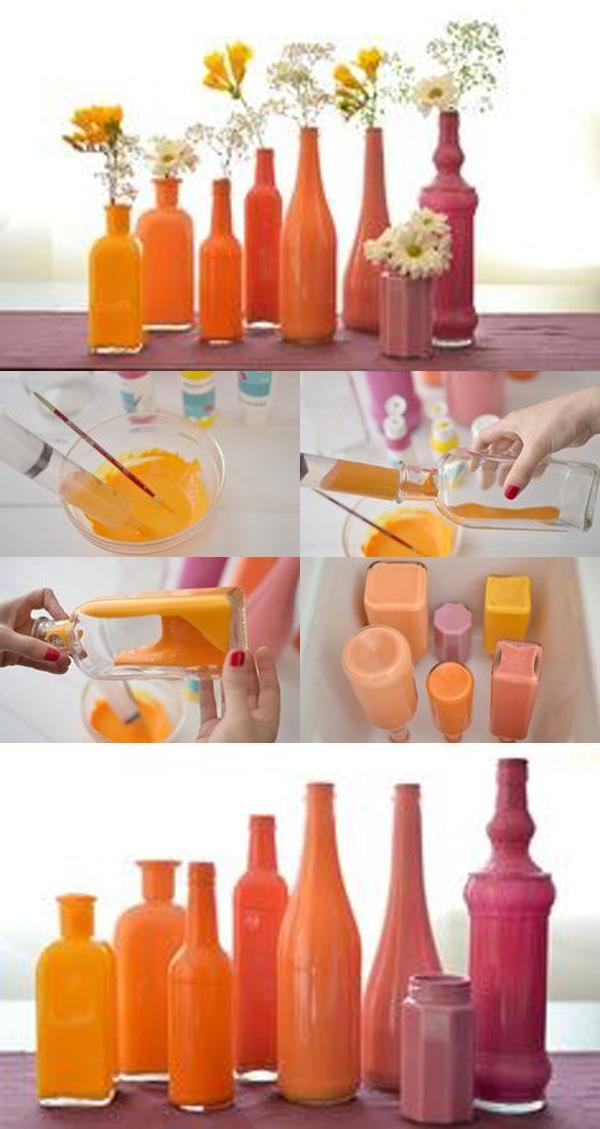
Paint your wine and other glass bottles from the inside! Make sure your glass color palette is consistent, and your bottles will look very interesting, keeping that sheer glass has, popping out the richness of color.
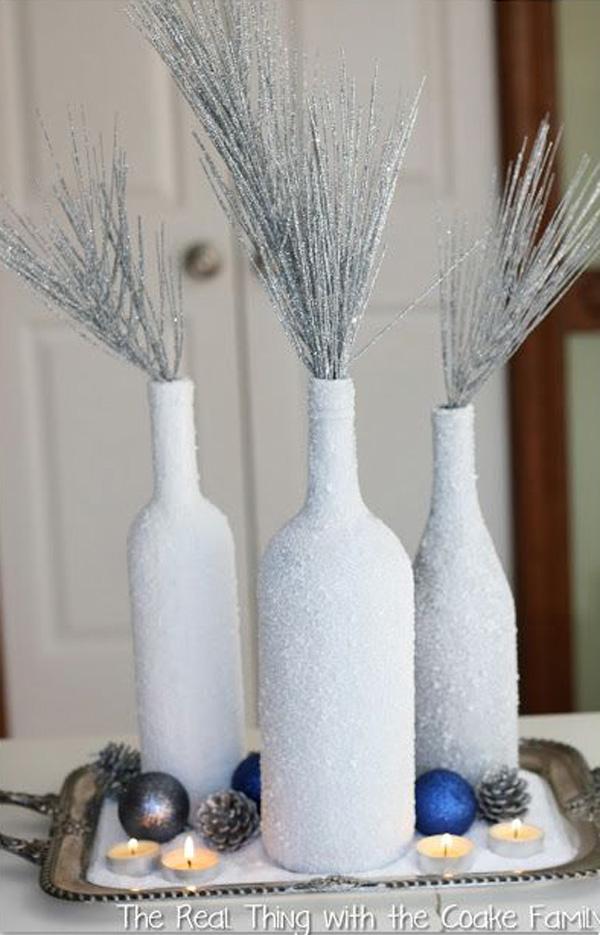
Shimmer, shimmer! Instead of rolling your white bottles in styrofoam, you can roll them in shimmer altogether and get a silvery heaven!
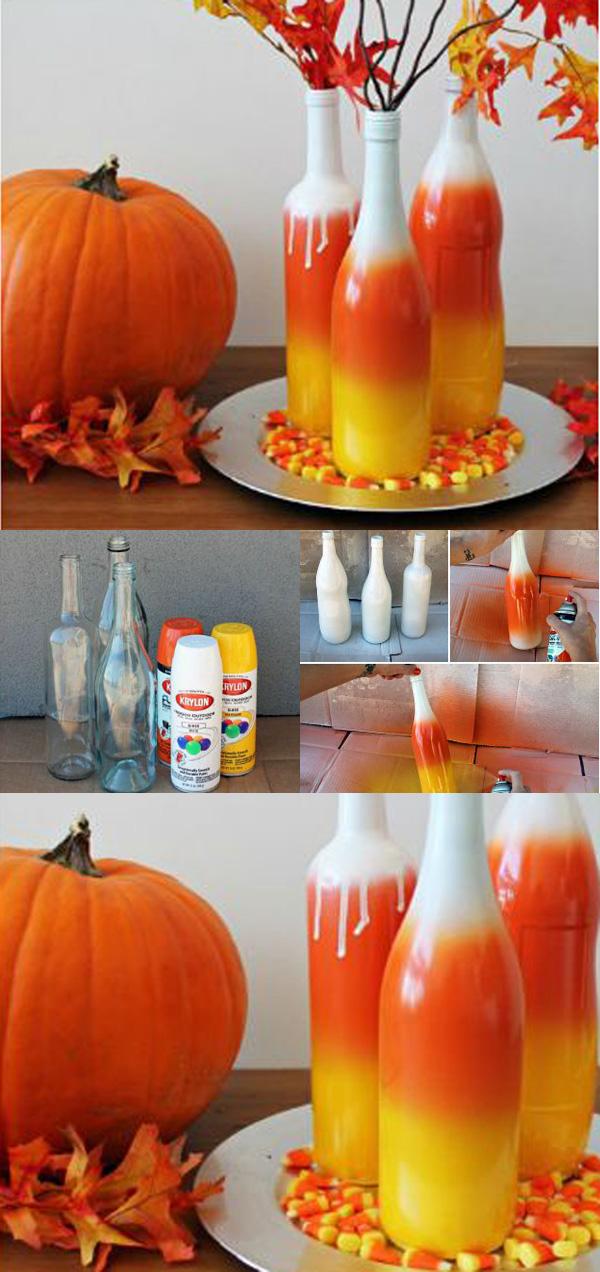
Perfect for Halloween! Choose spray can colors according to the holiday – orange, yellow and white, and paint one by one, allowing each to dry completely and letting it blend with the next one. Start with white, go on to yellow and orange, and finish with white and top off with a few autumn branches!
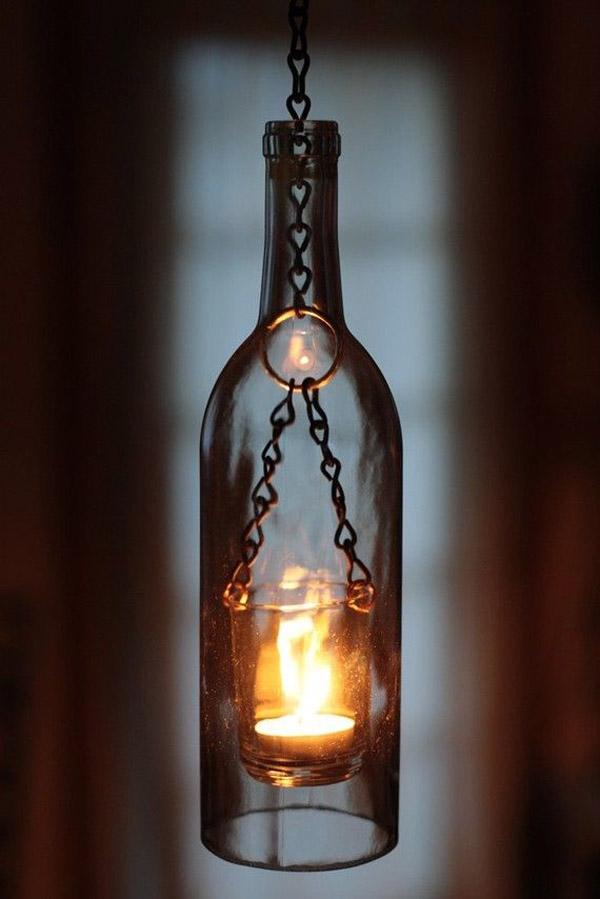
Candle shield bottle – use an empty transparent bottle as a candle shield for outdoor hanging candles. Cut off the bottom and allow the candle to breathe, while the breeze or wind cannot hurt the little flame.
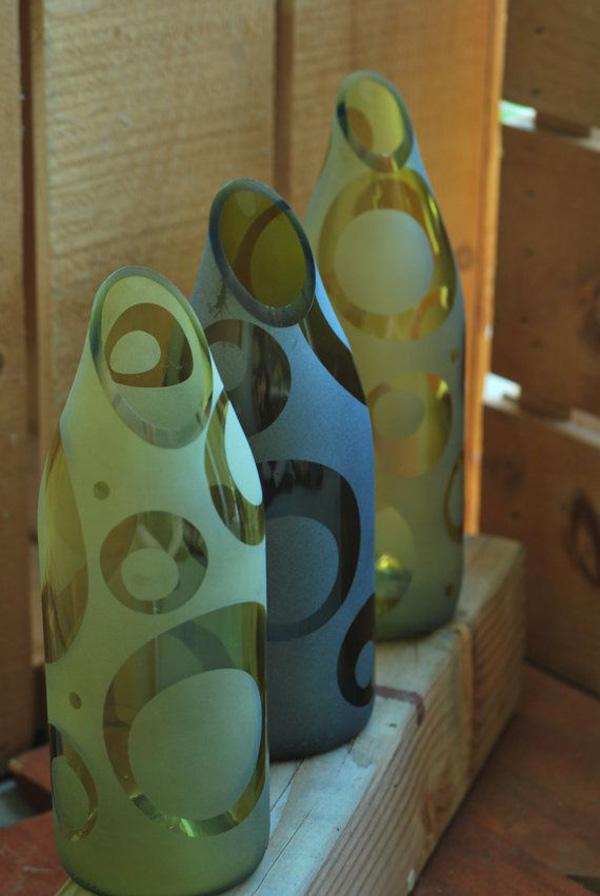
Previously decorative bottles can be transformed into vases by cutting their necks off – this end much better than it sounds. Choose sanded bottles, in colors if you can. Slide the cutter diagonally for a more interesting effect.
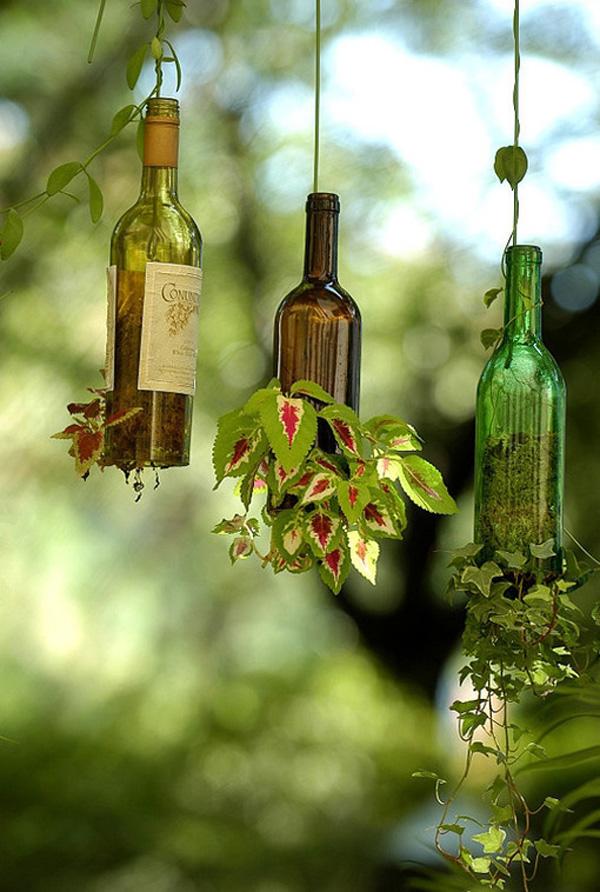
Upside-down flower pots. Fill out the bottles without bottom with compost and let your climber plants go through them and exit on the other side. The effect is visually amazing and the plants are happy!
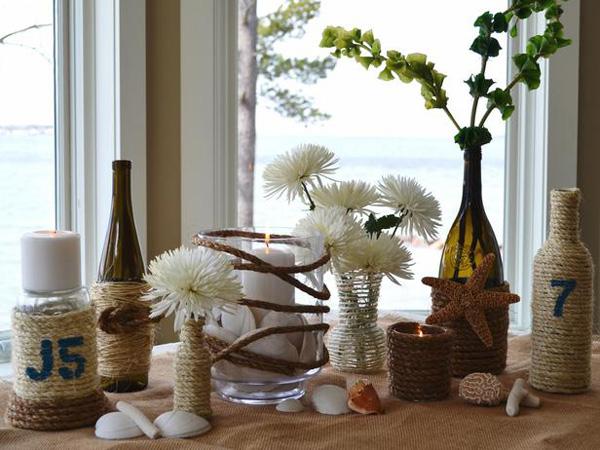
Navy bottles. Use thick, boat rope in different nuances, navy blue and seashells and stars for decoration. A group of bottles embellished this way can be a little seaside reminder, so fill it with sand and coastal plants for extra impression. Design by Joanne Palmisano.
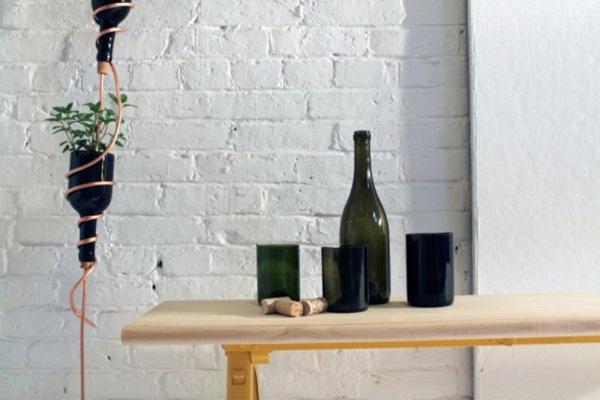
Another upside-down flower pot. This time, the upper half of the bottle is used as a regular pot – corked from the bottom and filled with earth and plants from the top. Hang it from the ceiling with rope and wire and you’ll get a small hanging garden – perfect for growing herbs!
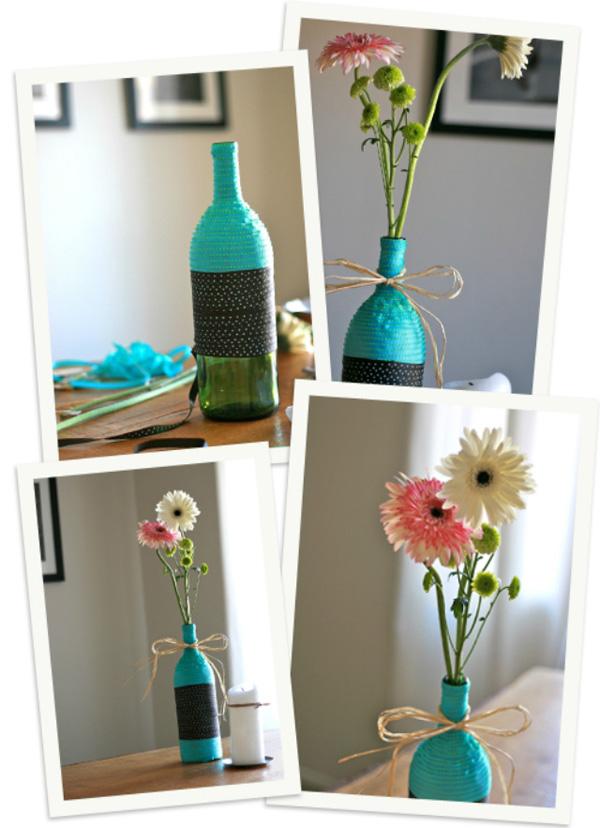
Combine ribbons, ropes, colors and raffia for different designs and solutions. Every bottle has an originally beautiful shape worth exploring.
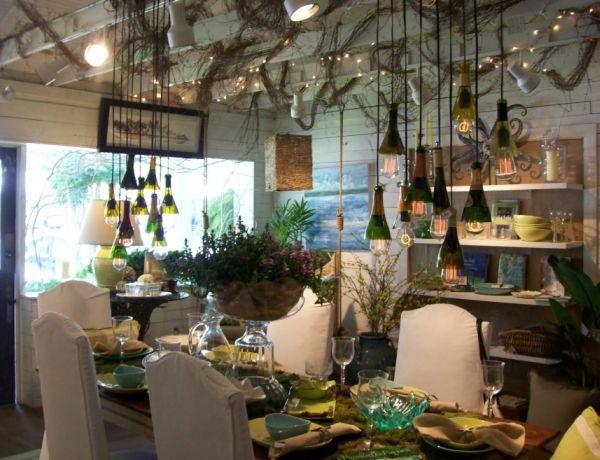
Tops of various wine bottles can serve as small chandeliers in a rustic dining room. They will give the room heaps of character and something nobody else has – along with great stories about all the special moments enriched with wine!

How do the upside down plants not fall out of the hanging wine bottles? I love that idea!!
this is so impressive i cant imagine wine bottles can do all these wonders
thatnk you